Building a wooden deck can transform your outdoor space into a beautiful and functional area for relaxation and entertainment. At 518, we've seen firsthand how a well-constructed deck enhances homes and improves quality of life.
Our step-by-step guide to wooden deck construction will walk you through the entire process, from planning to completion. Whether you're a DIY enthusiast or considering hiring professionals, this guide will provide valuable insights to help you create the deck of your dreams.
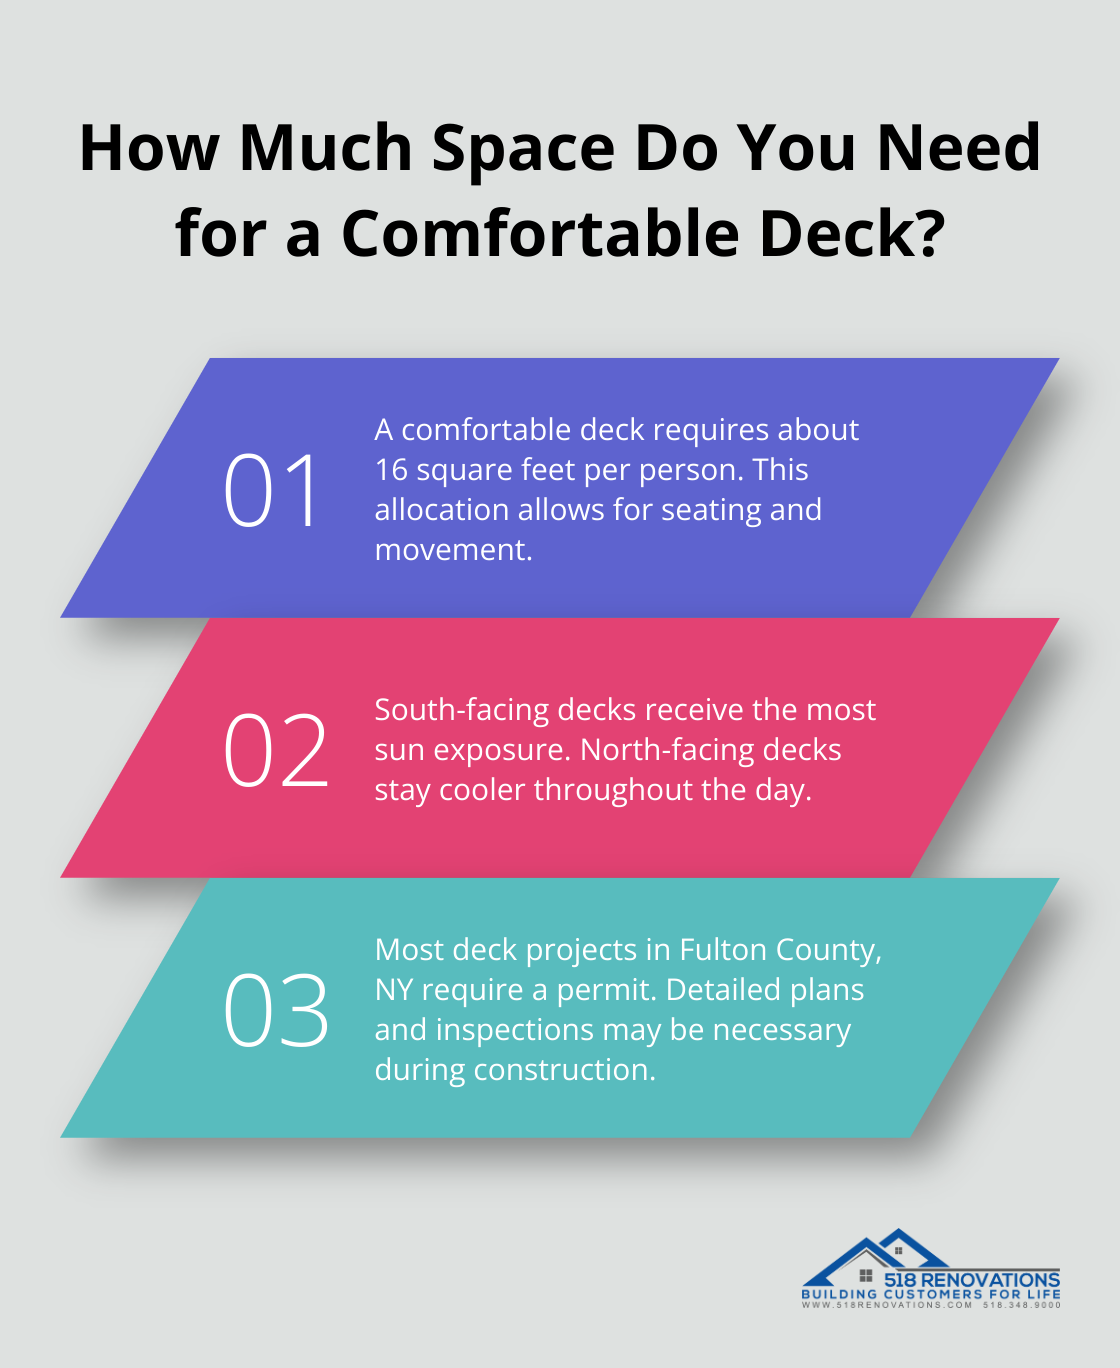 When you choose a location, think about sun exposure, privacy, and views. South-facing decks get the most sun, while north-facing ones stay cooler. Also, check your property lines and local zoning laws to ensure compliance.
 Sloped terrain might require a retaining wall or fill dirt to create a level base. Use a laser level or string level to achieve a perfectly flat surface. Even a slight slope can cause issues down the line, so take your time to get this right.
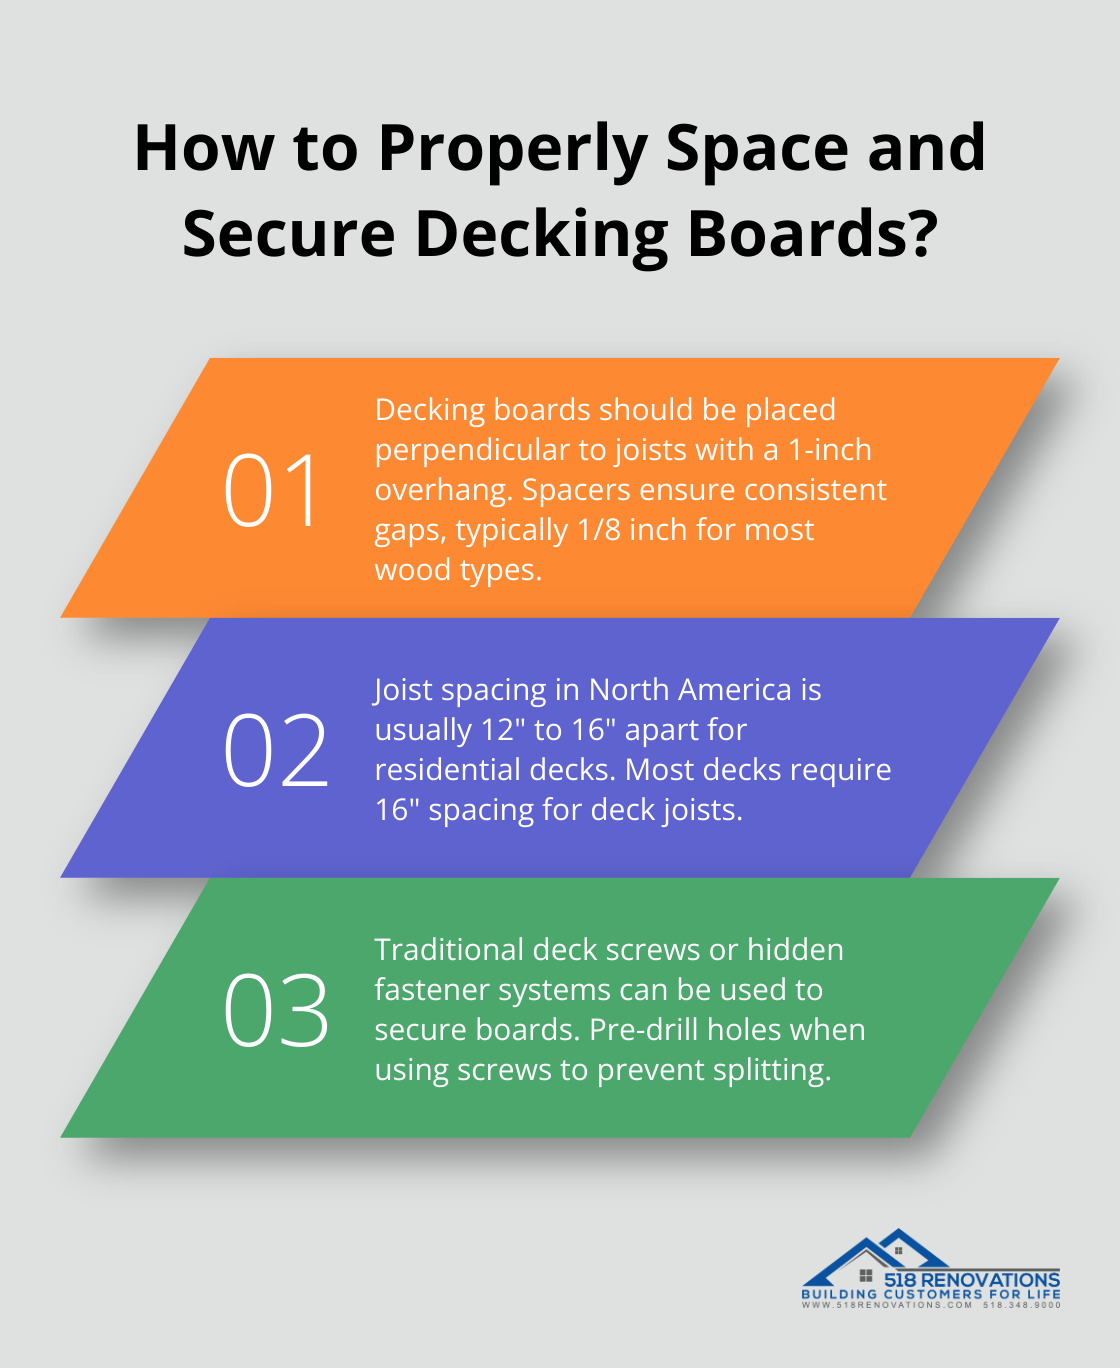 Use spacers between boards to ensure consistent gaps. These gaps allow proper drainage and wood expansion. For most wood types, a 1/8 inch gap suffices. (Check manufacturer recommendations for composite decking, as some require larger gaps.)
When laying decking joists, keep in mind that in North America, joist spacing for residential decks is typically 12" to 16" apart, or according to local building code. Most decks require 16" spacing for the deck joists.
Use spacers between boards to ensure consistent gaps. These gaps allow proper drainage and wood expansion. For most wood types, a 1/8 inch gap suffices. (Check manufacturer recommendations for composite decking, as some require larger gaps.)
When laying decking joists, keep in mind that in North America, joist spacing for residential decks is typically 12" to 16" apart, or according to local building code. Most decks require 16" spacing for the deck joists.
 A well-built wooden deck offers numerous benefits, providing an ideal space for outdoor entertaining and relaxation. It increases home value and curb appeal, making it a wise investment in your property. The deck also extends your living area, giving you more room to enjoy the outdoors without extensive landscaping.
We encourage you to take the first step in adding a deck to your home. For those in Fulton County, NY seeking expert assistance with their deck construction projects, we at 518Renovations are here to help. Our team of skilled professionals can guide you through every stage of the process, ensuring a high-quality result that meets your specific needs.
A well-built wooden deck offers numerous benefits, providing an ideal space for outdoor entertaining and relaxation. It increases home value and curb appeal, making it a wise investment in your property. The deck also extends your living area, giving you more room to enjoy the outdoors without extensive landscaping.
We encourage you to take the first step in adding a deck to your home. For those in Fulton County, NY seeking expert assistance with their deck construction projects, we at 518Renovations are here to help. Our team of skilled professionals can guide you through every stage of the process, ensuring a high-quality result that meets your specific needs.
Planning Your Dream Gloversville Deck
Sizing and Positioning Your Deck
The size and location of your deck will significantly impact its functionality and your overall satisfaction. Consider how you'll use the space. Do you want room for a grill, dining area, or lounge chairs? A good rule of thumb allocates about 16 square feet per person for comfortable seating and movement.Selecting the Right Wood
Your choice of wood will affect your deck's appearance, durability, and maintenance needs. Pressure-treated wood is affordable and durable but may have chemical concerns, while cedar and redwood offer natural resistance to decay and a beautiful appearance. However, they come at a higher price point. For those who look for low-maintenance options, composite decking materials are worth considering. While more expensive upfront, they require less upkeep over time.Navigating Permits and Regulations
Before you start building, check with your local building department about permit requirements. In Fulton County, NY, most deck projects require a permit. This process typically involves submitting detailed plans and may include inspections during construction. Don't skip this step – building without proper permits can lead to fines and complications when selling your home.Crafting Your Deck Design
A well-thought-out design is essential for both aesthetics and functionality. Consider features like built-in seating, planters, or a pergola for shade. Think about traffic flow and how the deck will connect to your home and yard. Sketch out your ideas or use deck design software to visualize the final product. This step will help you communicate your vision to contractors (or serve as a blueprint if you're tackling the project yourself).Calculating Materials and Costs
Once you have a design, it's time to estimate materials and costs. Factor in decking boards, framing lumber, fasteners, and any additional features like railings or stairs. Don't forget to include tools if you're DIYing. Add a 10-15% buffer to your material calculations to account for waste and mistakes. This extra cushion can save you from costly mid-project supply runs. With your plan in place, it's time to move on to the next exciting phase: preparing the site and building the foundation for your new deck.Building a Solid Foundation
Clearing and Leveling the Site
The first step in building your deck's foundation is to clear and level the area. Remove all vegetation, rocks, and debris from the site. Use a shovel and rake to create a flat surface. For larger areas or tough soil, consider renting a power tiller.Marking and Measuring
After you clear and level your site, mark the deck's outline. Use stakes and string to create a perimeter that matches your design plans. Double-check all measurements to ensure accuracy. At this stage, locate and mark any underground utilities. Call your local utility companies or dial 811 to have them mark these for you. This step is not just about convenience – it's a safety requirement in most areas.Installing Footings and Posts
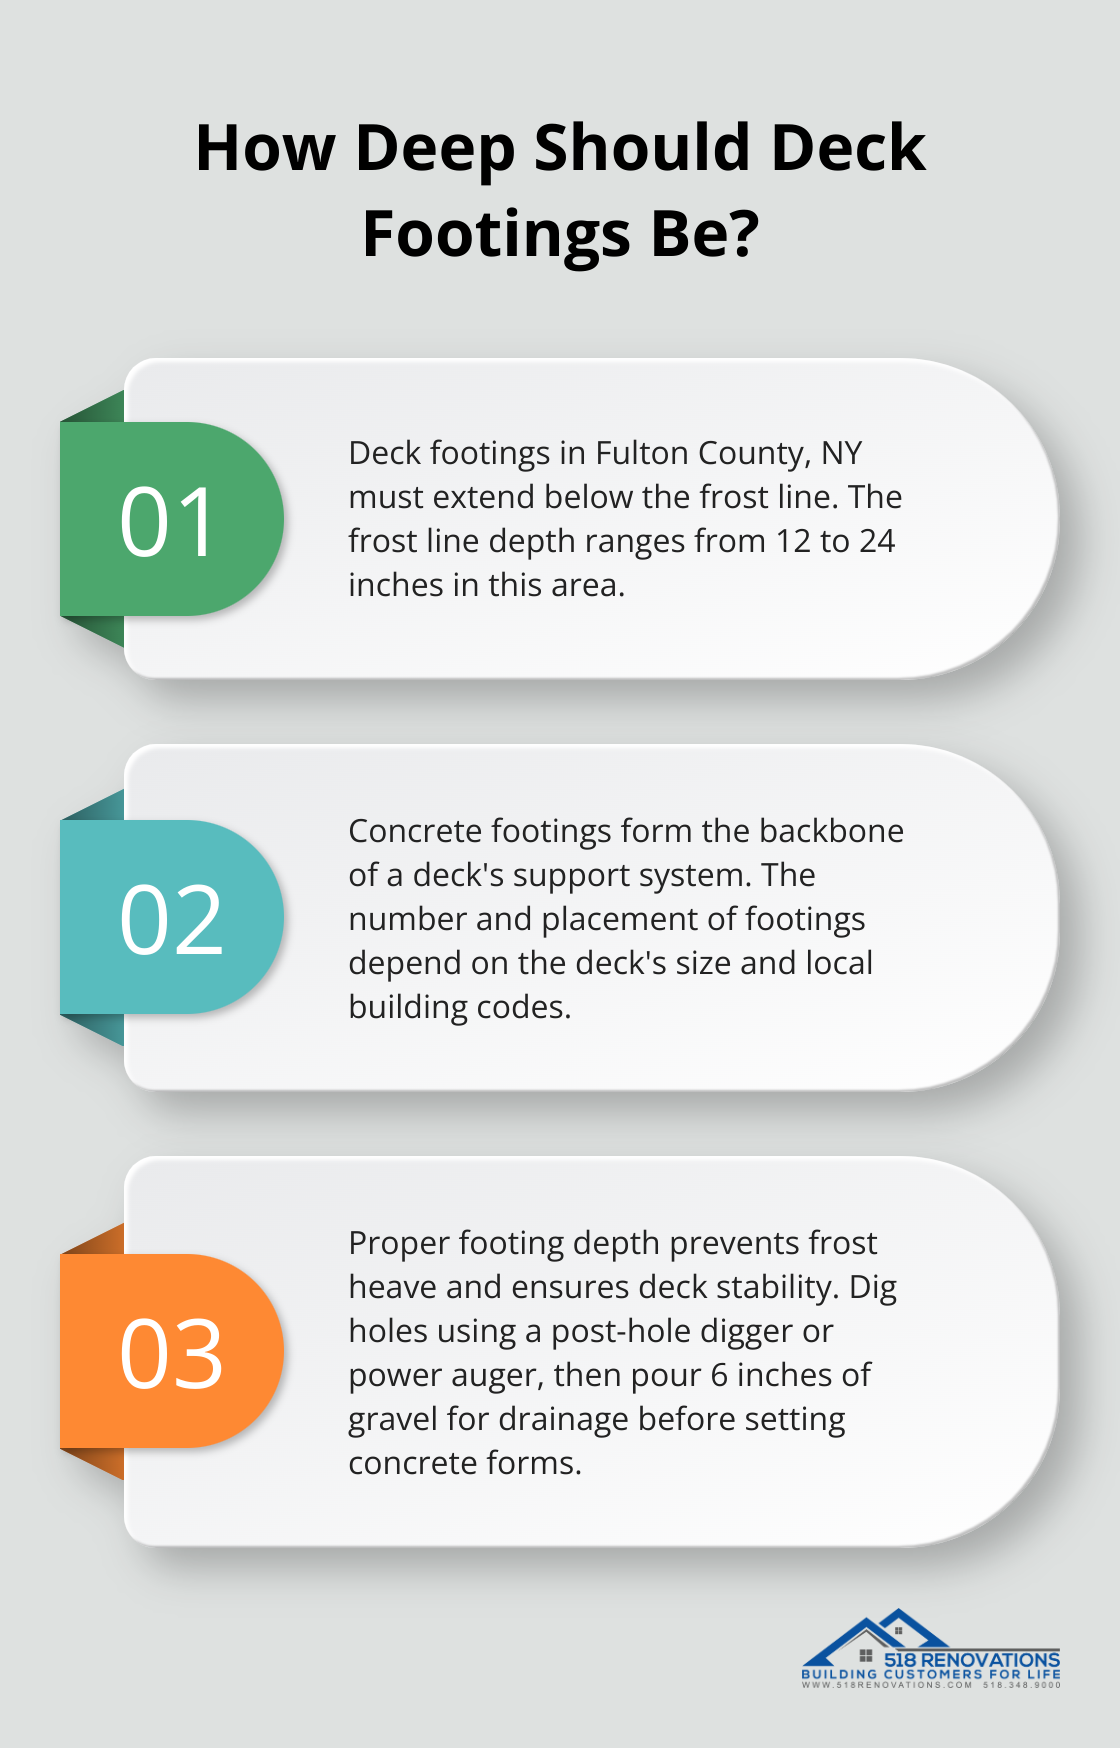
Concrete footings form the backbone of your deck's support system. The number and placement of footings depend on your deck's size and local building codes. In Fulton County, NY, footings typically need to extend below the frost line, which can range from 12" to 24" deep. Dig holes for your footings using a post-hole digger or power auger. Pour about 6 inches of gravel into each hole for drainage, then set cardboard concrete forms. Mix and pour concrete into the forms, inserting J-bolts for attaching post anchors while the concrete is wet. After the concrete cures (usually 24-48 hours), attach post anchors and secure your support posts. Use a level to ensure each post is perfectly vertical, and brace them temporarily until you complete the framing.Attaching the Ledger Board
The ledger board connects your deck to your house and bears a significant portion of the deck's weight. Install this correctly to prevent water damage and structural issues. First, remove siding where the ledger will attach. Install flashing to direct water away from your house. Then, secure the ledger board to the house's rim joist or wall studs using lag screws or through-bolts. Code-compliant structural wood screws are engineered to fasten a deck ledger board to the rim joist of a house with no pre-drilling. Ensure the ledger is level and use spacers to allow for water drainage.Framing the Deck
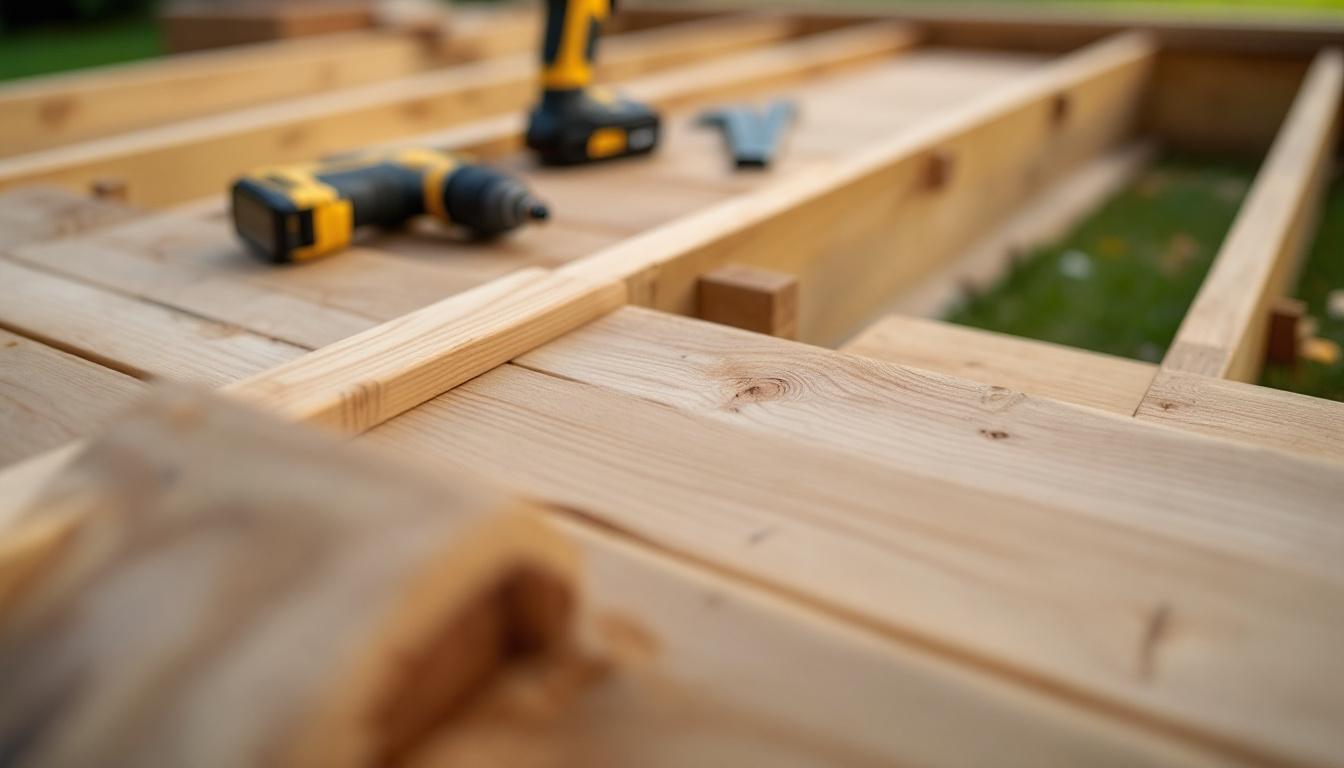
With your posts and ledger in place, install the remaining framing components. Start by attaching beams to your support posts. These will carry the weight of your joists and decking. Next, install rim joists around the perimeter of your deck. These create a frame for your deck boards and provide lateral support. Finally, install interior joists, typically spaced 16 inches on center. Use joist hangers to secure them to the ledger and rim joists. Throughout this process, continually check for level and square. Small adjustments at this stage can prevent major headaches later on. Now that you've laid a solid foundation for your deck, it's time to move on to the exciting part: constructing the deck surface. This next phase will bring your vision to life as you lay the decking boards and add the finishing touches.Bringing Your Deck to Life
Laying the Decking Boards
Start the decking process at the edge farthest from the house. Place boards perpendicular to the joists, allowing for a slight overhang (typically about 1 inch). This overhang enhances appearance and aids water runoff.Securing Boards
Choose your fastening method wisely. Traditional deck screws offer reliability, while hidden fastener systems provide a cleaner look. If you opt for screws, use two per joist and pre-drill holes to prevent splitting. Note that while hidden fasteners are ideal for an installed deck surface, they may not be suitable for stairs, picture frames, or boards with a radius bend.Cutting Around Obstacles
You'll likely encounter posts or irregular edges as you work. Use a jigsaw or circular saw with a fine-toothed blade for clean cuts around these obstacles. Always measure twice and cut once to avoid costly mistakes.Adding Trim
Install trim boards around the perimeter of your deck to cover the ends of decking boards and joists. This step improves appearance and protects the end grain of the wood from moisture.Sanding for Smoothness
Sand any rough spots or splinters to finish your deck. Pay special attention to board ends and cut areas. A smooth surface not only looks better but also provides safer footing (especially for bare feet). Taking extra care during this phase can significantly enhance the final look and feel of your deck. The decking surface is what you'll see and touch every day, so it's worth the time investment to get it right.Final Thoughts
Wooden deck construction is a rewarding project that enhances outdoor living spaces. It requires attention to detail, adherence to local building codes, and quality craftsmanship. Regular maintenance (including annual cleaning and periodic sealing) preserves the deck's beauty and extends its lifespan.


